· Tools · 3 min read
LiteLLM — One API for Every LLM
Why LiteLLM is so handy when you're building with LLMs — one OpenAI-style interface for 100+ providers — plus how to install it, call different models, and run the proxy server.
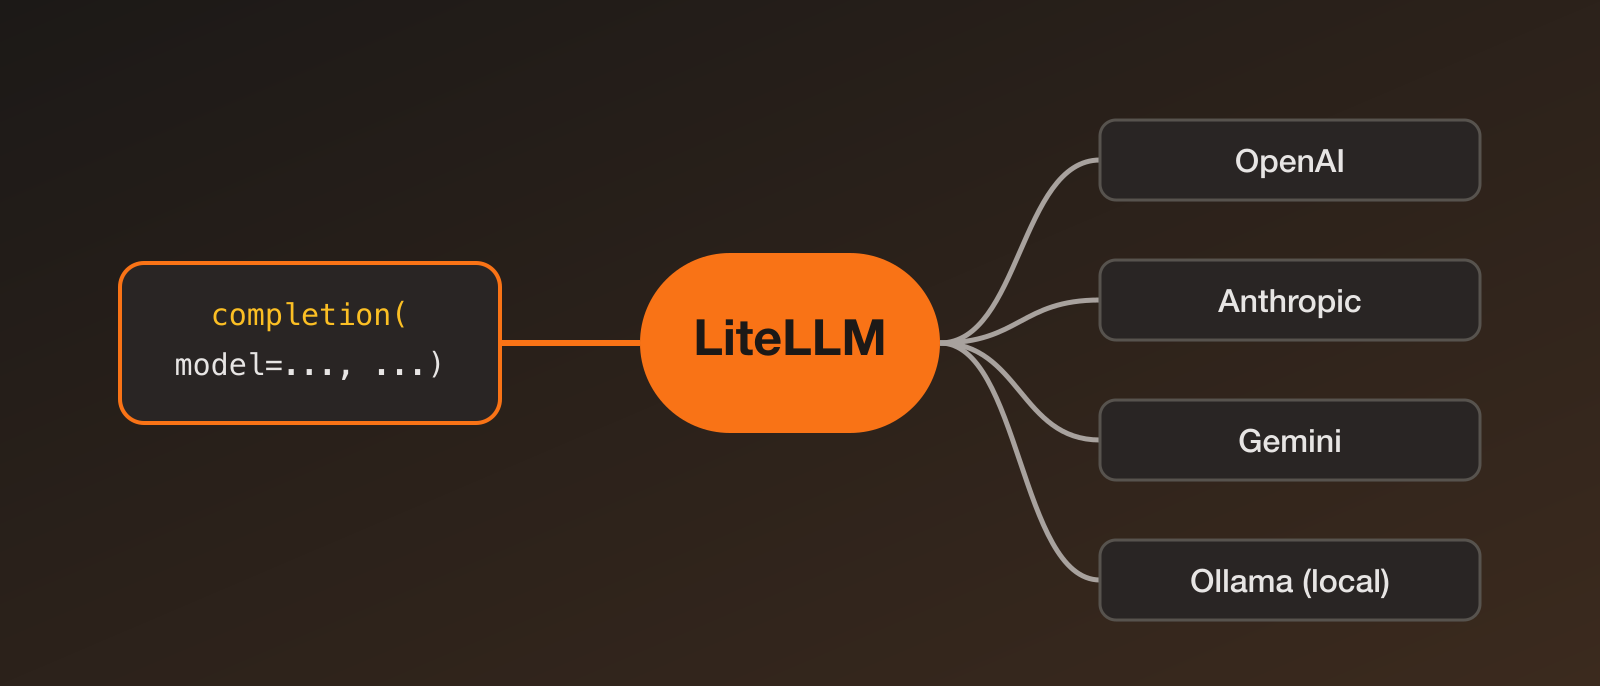
While building my LLM projects, I kept running into the same annoyance. I’d start with one provider, then want to try another model to compare answers, or switch to a cheaper one, or run something locally. Every provider has its own SDK, its own request format and its own response shape. Swapping models meant rewriting code.
LiteLLM fixes exactly that.
What is LiteLLM?
LiteLLM is an open-source Python library (and optional proxy server) that gives you one consistent, OpenAI-style interface for calling over 100 LLM providers — OpenAI, Anthropic, Google Gemini, Azure, AWS Bedrock, Ollama for local models, and many more.
You call the same completion() function every time and only change the model name.
Why it’s useful
- Switch models by changing a string — no new SDK, no new request format. Great for comparing models side by side.
- Same response shape everywhere — you always read
response.choices[0].message.content, whichever provider answered. - Easy local + cloud mix — use a hosted model in production and an Ollama model while developing offline.
- Fallbacks and retries — if one provider is down or rate-limited, route the request to another.
- Cost tracking — LiteLLM can calculate the cost of each call, which is helpful when your student budget is tiny.
- Streaming and async — supported with the same interface.
- A proxy server — run a gateway that any OpenAI-compatible client can talk to, with keys, budgets and logging in one place.
It doesn’t make a weaker model smarter, but it keeps your code from being tied to a single vendor.
Installation
python -m venv .venv
source .venv/bin/activate   # on Windows: .venv\Scripts\activate
pip install litellm
LiteLLM reads API keys from environment variables, so set the ones for the providers you want:
export OPENAI_API_KEY="your-openai-key"
export ANTHROPIC_API_KEY="your-anthropic-key"
Your first call
from litellm import completion

messages = [{"role": "user", "content": "Explain recursion in one sentence."}]

response = completion(model="gpt-4o-mini", messages=messages)
print(response.choices[0].message.content)
Now the same code with a different provider — only the model name changes:
# Anthropic
response = completion(model="anthropic/claude-sonnet-5-5", messages=messages)

# A local model running in Ollama
response = completion(model="ollama/llama3", messages=messages, api_base="http://localhost:11434")
The provider/model-name format tells LiteLLM where to send the request. Check the provider docs for the exact model names, since they change often.
Streaming
response = completion(model="gpt-4o-mini", messages=messages, stream=True)

for chunk in response:
    print(chunk.choices[0].delta.content or "", end="")
Fallbacks
If the first model fails, LiteLLM can try the next one:
response = completion(
    model="gpt-4o-mini",
    messages=messages,
    fallbacks=["anthropic/claude-sonnet-5-5"],
)
Tracking cost
from litellm import completion, completion_cost

response = completion(model="gpt-4o-mini", messages=messages)
print(f"Cost: ${completion_cost(completion_response=response):.6f}")
The proxy server
If you want a single endpoint for all your apps, LiteLLM can run as an OpenAI-compatible gateway. Create a config.yaml:
model_list:
  - model_name: fast
    litellm_params:
      model: gpt-4o-mini
      api_key: os.environ/OPENAI_API_KEY
  - model_name: smart
    litellm_params:
      model: anthropic/claude-sonnet-5-5
      api_key: os.environ/ANTHROPIC_API_KEY
Install the proxy extras and start it:
pip install 'litellm[proxy]'
litellm --config config.yaml
By default it listens on http://localhost:4000. Any app that uses the OpenAI SDK can now point at it:
from openai import OpenAI

client = OpenAI(base_url="http://localhost:4000", api_key="anything")
reply = client.chat.completions.create(
    model="smart",
    messages=[{"role": "user", "content": "Hello!"}],
)
print(reply.choices[0].message.content)
Now you can change which real model sits behind smart by editing the config — your app code stays the same.
Where to go next
- Read the docs at docs.litellm.ai.
- Try the same prompt across three models and compare quality, speed and cost.
- Pair it with a Streamlit front end to build a model-comparison app.
- Explore the proxy’s virtual keys and budgets if you share your setup with others.
If you’re building anything with LLMs, try LiteLLM early. Not being locked into one provider makes experimenting much easier.